How to Setup an Auto Responder on Your Ponder Consulting Hosted Email
April 22, 2015
Planning on being out of the office for a period of time and want a way to let those who email you know? You want an auto responder. The auto responder option is one which automatically sends a reply to those emailing you, providing them with a specific message, generally that you will be out of the office and not responding to emails personally until you are back at a specific time, or whatever you would like to say.
If this is something that you find will be useful and are a client of Ponder Consulting, you have this feature available to you from your webmail. Here are the steps to follow to set-up your auto responder from your Ponder Consulting email account.
1. Begin by logging into your email
Ex – http://www.yourdomainname.com/webmail
2. From this page you need to click on the “Auto Responder” tab
3. Here you will be take to another screen where you will need to click “Add New Responder”]
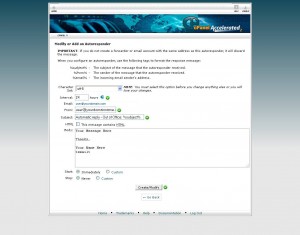
4. Input your specific information (see screenshot)
Note: Interval should be 24 hours – means how often do you want to send them to people who email you, not more than once in 24 hours
From: user@yourdomainname.com
Subject: Automatic reply – Out of Office: %subject%
Body: “I will be out of the office from this date and time through this date and time. I will be periodically checking my email while I’m out. Thank you, Your Name“
5. Then click the “Create/Modify” button at the bottom and test from a gmail to be sure all forwards correctly and you are ready go.
You should now have your own personalized auto responder and be ready to get out of the office for a couple days without worrying about your email.
How To Set Up Your Ponder Consulting Hosted Email On Your iPhone
November 2, 2012
 If you are an iPhone owner and would like to stay connected by accessing your email via your iPhone, here is how to do it.
Setting Up Your iPhone
To setup your email use these settings:
Click on Settings
Click on Mail, Contacts and Calendar
Select Other (not iCloud, Exchange, etc.)
Click Add Mail Account
Name: Your Name As You Would have It Appear (in recipients inbox)
Email: user@yourdomainname.com (always enter the full address)
Password: your password (case sensitive)
Description: Your Email Description (example Jane’s Email)
Click Next
On next screen be sure to select the “POP” tab rather than “IMAP”
Name: Your Name
Email: user@yourdomainname.com (always enter the full address)
Description: Your Email Description (example Jane’s Email)
Incoming Mail Server
port: 110 (always)
POP or IMAP? POP will download email to your local device whereas IMAP will be viewing the files on the server. The important thing to understand is if you use IMAP and delete a file, it is deleted from the server or if you move a folder, it is moved on the server. For this reason, we prefer POP. POP also provides a backup of what is on the server.
host name: mail.yourdomainname.com (example mail.ponderconsulting.com)
username: user@yourdomainname.com (always enter the full address)
password: your password (case sensitive)
Outgoing Mail Server (this is not optional as it says)
port: 587 (26 can also be used but new standards are 587)
host name: mail.yourdomainname.com (example mail.ponderconsulting.com)
username: user@yourdomainname.com (always enter the full address)
password: your password (case sensitive)
Click Save
You will see a “Cannot Verify Server Identity” error message but click Continue anyway (may have to select Continue multiple times).
Congratulations! Your email should work!
You can always check your email at www.domainname.com/webmail or pon.ponderconsulting.com:2096.

